Showing posts with label Slipcover. Show all posts

Monday, March 16, 2015

Ottoman slipcover

This ottoman slipcover was fairly straightforward.  The only unusual thing about it was making the top out of four pieces so that the design was "up" from each side.  But this helped contour the top, so is a practice I will consider doing for any rounded top, even when the design does not require it.

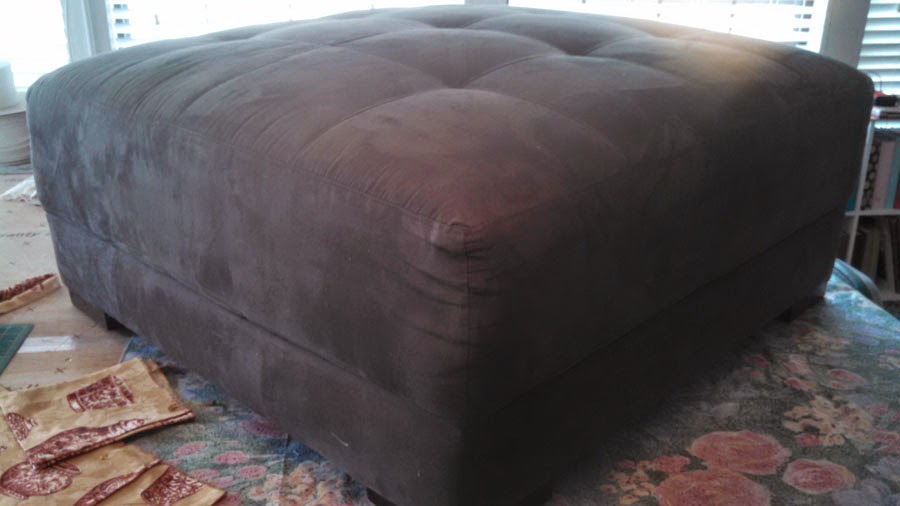
Here is the "before" picture.  The ottoman measures 37.5" on each side.


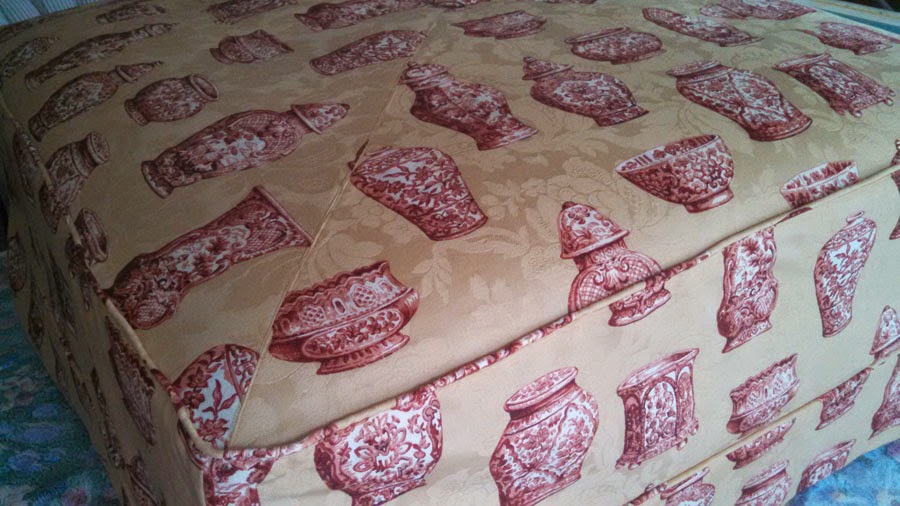
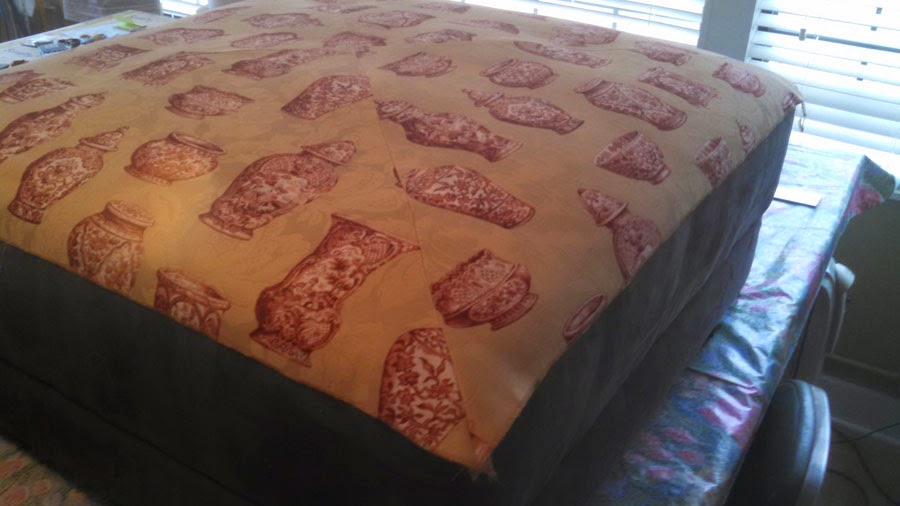
The pieced top.  The four triangular pieces came together in the middle.  I topstitched the seam allowances to give a flat appearance.


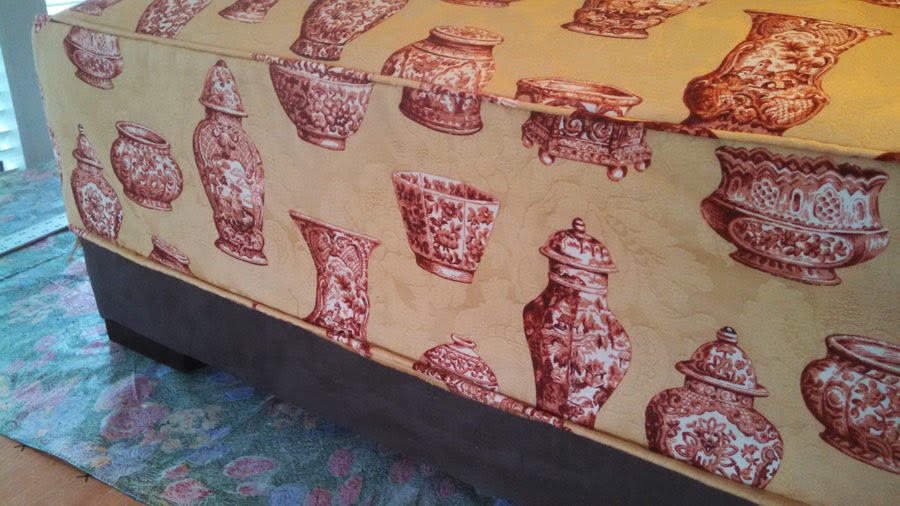
After attaching cording to the top and side and sewing the sides to the top.


I lined the skirts.  This picture shows mitering the corners on the inside after sewing the lining to the bottom and sides.

The serging is visible here as well.  As a rule, I serge all edges either right after cutting or after completing a seam.


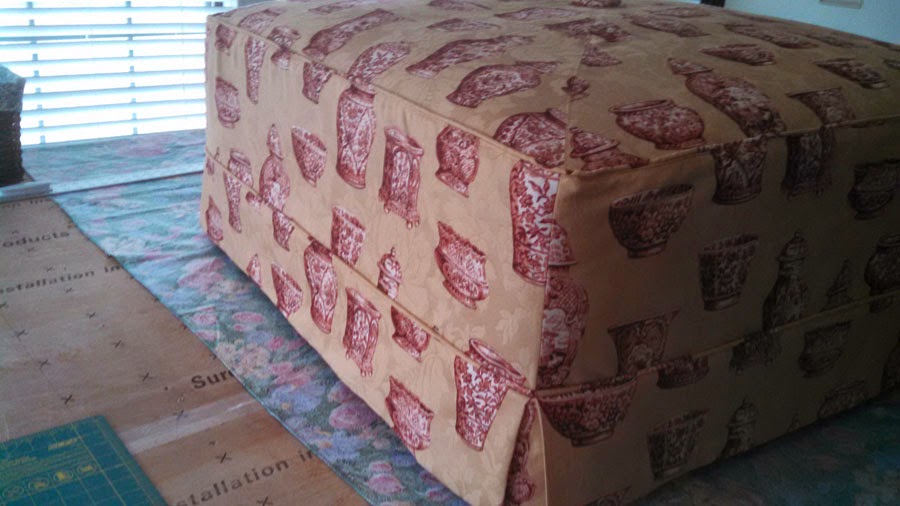
This picture was taken after I basted on the skirt.  I decided it wasn't long enough, so I removed it and lowered it an inch.  Now it just grazes the floor.

You can (barely) see the cover button attached to the top center.  You can also see the separate skirt corner pieces that give it a pleated look.


A closer picture of the top.  The increased seam allowance toward the corners of the ottoman helps it lie flat and follow the contours of the top.  The slipcover is just loose enough to pull on easily, but snug enough to be fitted.  The client was "well pleased" !!


Leather Cushion Slipcover

This project was to slipcover the seat and back cushions from a red leather chair.  Adding to the fun was the fact the cushions were attached with a zip-apart connector to keep them from slipping.  So instead of a zippered or overlapped opening, I would need to leave an open edge where the connector was attached to each piece.

Here is the "before" picture.  The seat cushion is on the left, the back cushion on the right.  They are unzipped at the moment, but you can see the flap on the seat cushion that zips to the bottom of the back cushion.

Since the back cushion was an odd shape, I first made a pattern out of muslin.  I cut pieces of the muslin and pinned them together to fit.  When I got the fit right, I marked the seams with chalk.

I unpinned the muslin and cut proper seam allowances next to the chalk lines.  The next step was to baste the pieces together and do a test (left).

Making a pattern like this is a lot of trouble, not the least of which is undoing the basting so you can use the pattern to cut out the face fabric (which is actually spread out underneath the cushion in these pictures).  But if this client ever needs another slipcover for these pieces, I will be able to use the pattern again!

Cutting out pieces for both cushions and their cording took some planning due to the size of the pieces and the fabric design having an "up."  And I wanted to ensure the seat cushion and back cushion lined up, design-wise.

Here is the finished top.  The slipcover fit snugly, but not too snugly. You can't see it here, but the bottom edge of this cushion is open to allow the connector to attach.

 Here is the finished seat.  I also made a muslin pattern for it.

 The two pieces connected together.  They turned out well, I thought.


Ottoman Cover for Plastic Container for Camper Storage

Wow, I have been busy the last few weeks, and unfortunately got behind on my posts.  The smaller projects have included hemming a tablecloth, making pillow shams, making a lined drape panel, making stuffed animals, and various clothing and crochet projects.  The project I will describe here is one to solve a storage problem on our camper -- thinking of better ways to handle storage being a popular obsession for campers!

Liking to kill two birds with one stone wherever possible, I wanted the storage to double as an ottoman, since I like to prop my feet up sometimes.  So I decided to take a plastic container, add a cushion to the top, and dress it up as an ottoman.

Here are my materials:  the container, foam for the cushion, cording, and upholstery fabric I found on the remnants table.

The foam deserves a little explanation.  Foam comes in various thicknesses - this is 4" - but usually comes in squares.  This piece was a 22" square.  To get it to fit the shape of the container, I first cut it to the right width (17"), then used 4" of the 5" strip that was cut off to add to the length to make it 26".  I had just a couple of little blocks left over.  I used a kitchen electric knife to make the very presentable cuts, and used glue to attach the two pieces.  It will hold its glued shape well, especially inside a tight cushion cover.

After measuring the container, I cut the fabric - a top piece that follows the shape of the contaner lid, 4 rectangular pieces for the sides, 4 pieces for the skirts, two pieces to form an overlapped opening under the cushion, and cording.  The covered cushion, with its attached skirt, will sit on top of the plastic container.


As a first step, I loosely basted the cording.  By keeping the cording a little loose, I know that this first stitching will not show on the outside when I make the final stitching.  (By loose, I mean I did not stitch very closely to the cord.)

Here I attach cording to the top piece.  I am still basting with long stitches, and not sewing too close to the cord.  The tighter, closer stitches will come when I do the final stitching in this area - when I attach the sides.

 After attaching the sides around the top, making sure the seams that connected the side pieces align with the corners of the top, I topstitched around all sides to hold the seam allowances down.
After attaching the sides, I attached the hemmed skirt pieces.  Notice the skirts overlap.  The two end skirt pieces are under the side skirt pieces, which lap around the ends a couple of inches.

After attaching the skirt pieces, I sewed on the overlapping bottom pieces.  The seams have gotten a little thick at this point, but fortunately my machine can handle it!
 I knew it would be tight getting the foam inserted through the opening underneath.  But I got it in.  Who needs a gym, anyway, with this kind of workout available?

As a last task, I cut a piece of batting and inserted it to lie on top of the foam to give a softer appearance to the cushion top.  Not easy, but easier than trying to manage inserting the foam if I had already attached it!

The finished ottoman. The fabric was a perfect match for our camper upholstery!

Besides being a handy footrest/coffee table, it will allow us to keep some things handy without adding to the clutter.  We think the ottoman will be a good place to put our laptops and other electronics when not in use.

Friday, March 14, 2014

Channel-back Chair Slipcover

Another day, another project.  At least, that is what my life seems to be lately!    Since I will be offering various sewing and craft services to the public, it seemed like a good idea to share my projects, results, and thoughts with you as I go. 

My current project is slip-covering a chair in my sun room.  This chair was compromised from the beginning when the upholsterer ran my floral fabric sideways!  (Another story for another time…)  For the last couple of years it has been one of the beds of choice for my dogs, who spend the night in that room.  Needless to say, it isn’t people-friendly anymore!   

My plan is to make a slipcover and put it on the chair, then cover it with a vinyl piece that will keep the chair itself clean and dog-smell-free.  After cleaning and deodorizing the chair, I went ahead and did the vinyl cover, cutting to fit and sewing around the front of the arm.  You’ll see the finished vinyl piece later…  


Getting started on the slipcover, the first steps were to prewash the fabric, then iron it.  

By prewashing, I know that I will not have a problem later when I wash the slipcover!  It is worth the extra steps.   When the fabric was ready, I measured all of the cording needed and went ahead and prepared all the cording in the lengths I would need.

The cushion came next.  The picture shows tracing the cushion to get a pattern.  You can see how yucky that cushion is!  I took the old fabric off and threw it away.  Also in the picture is the zipper section that goes in the back of the cushion.  

The next picture shows starting the fitting.  I knew this chair would be a little more difficult because it is a “channel back”, meaning there are deep channels down the inside back.  If you are upholstering, no problem – you cut new pieces from the old and sew them together.   This leads me to mention that upholstery is generally much easier than slipcovering (once the staples and old fabric have been removed) because you can use the old pieces as a pattern.  Plus for the most part in upholstery you attach one piece at a time to the frame, adjusting and finalizing as you go, stapling in place.  With a slipcover, you have to pin or mark pieces, then take the pieces to your sewing machine to sew together, then put them back on and keep going.  (I used pins, said “ouch” a lot.)   And the piece has to be able to be put on, fit tightly, and come back off for washing. 

With this chair, the channels had to be tucked, and left as deep as possible so the tucks could be pushed into the channels in the finished piece.   It was time-consuming, but turned out.

After preparing the inside back, I cut the under-seat-and-front piece to size, then fitted the inside arm from both sides onto it and sewed in together.  (The inside arm goes from the cushion area up and around the arm to the outside of the chair.)   Next was pinning and sewing the outside sides (underneath the arm) to the inside arm.  The front of the arms was the next tedious part!  The pictures show pinning the arm (as the others, with the wrong side of the fabric facing out) and the finished product (right side out).  

Almost done!  Next I attached the inside back (with the channels) to the inside arm and seat.  (Note that you have to leave several inches of extra length in the seams connecting the seat to the inside arms and to the inside back to tuck in.)   Then the back cording and back piece.  The back piece is easy except for the zipper, which isn’t bad, just more work.  Finally, the cording around the bottom.  I went back and forth about whether to have a skirt, but decided against it.  So I attached elastic pieces where the legs were to keep the slipcover from riding up.  

 
I used a zipper in the side of the back (shown above) to close the slipcover. 

I think the slipcover turned out well.   I worked on this over about 3 days, so easier said than done!

The vinyl piece I laid on top of the slipcover for the dogs may or may not stand up.  We have large dogs (standard poodle and  Labradoodle) and their claws and size just may be too much.  But we will see…  


Next  up – possibly Lord Farquaad costumes for the upcoming Shrek The Musical performance.  Should be fun!